Probably the most obnoxious thing that can happen mid combat in the middle of a match on Xbox live would either your batteries getting low on your controller, or your headset straight up not working.
Batteries can be replaced (Or if you’re smart you get a play and charge kit), but the included Xbox One Headphone and Microphone headset is not such a simple remedy.
However with a little time and patience you can fix yours (or buy a new one for $25).
To disassemble and repair your Xbox One Headset you’ll need:
– A flat spudger or plastic pry tool
– T5 torx screw driver
– soldering iron with a mild tip or rounded tip to redo the severed connections
– a multimeter is always a good idea to test the connectivity after the fact
When mine went, I noticed the factory solder was crumbling off, others may note some connections barely have any solder at all.
Have seen 3 so far in our shop.
Microsoft is pretty good about warranties also, you may want to contact them before attempting this repair, as it will most likely void the warranty on it.
If you’re in a rush and don’t want to wait for a replacement follow the short guide below and you can be back up and running again.
Undo all of the torx screws holding it together, and using a plastic pry tool or spudger carefully open the unit.
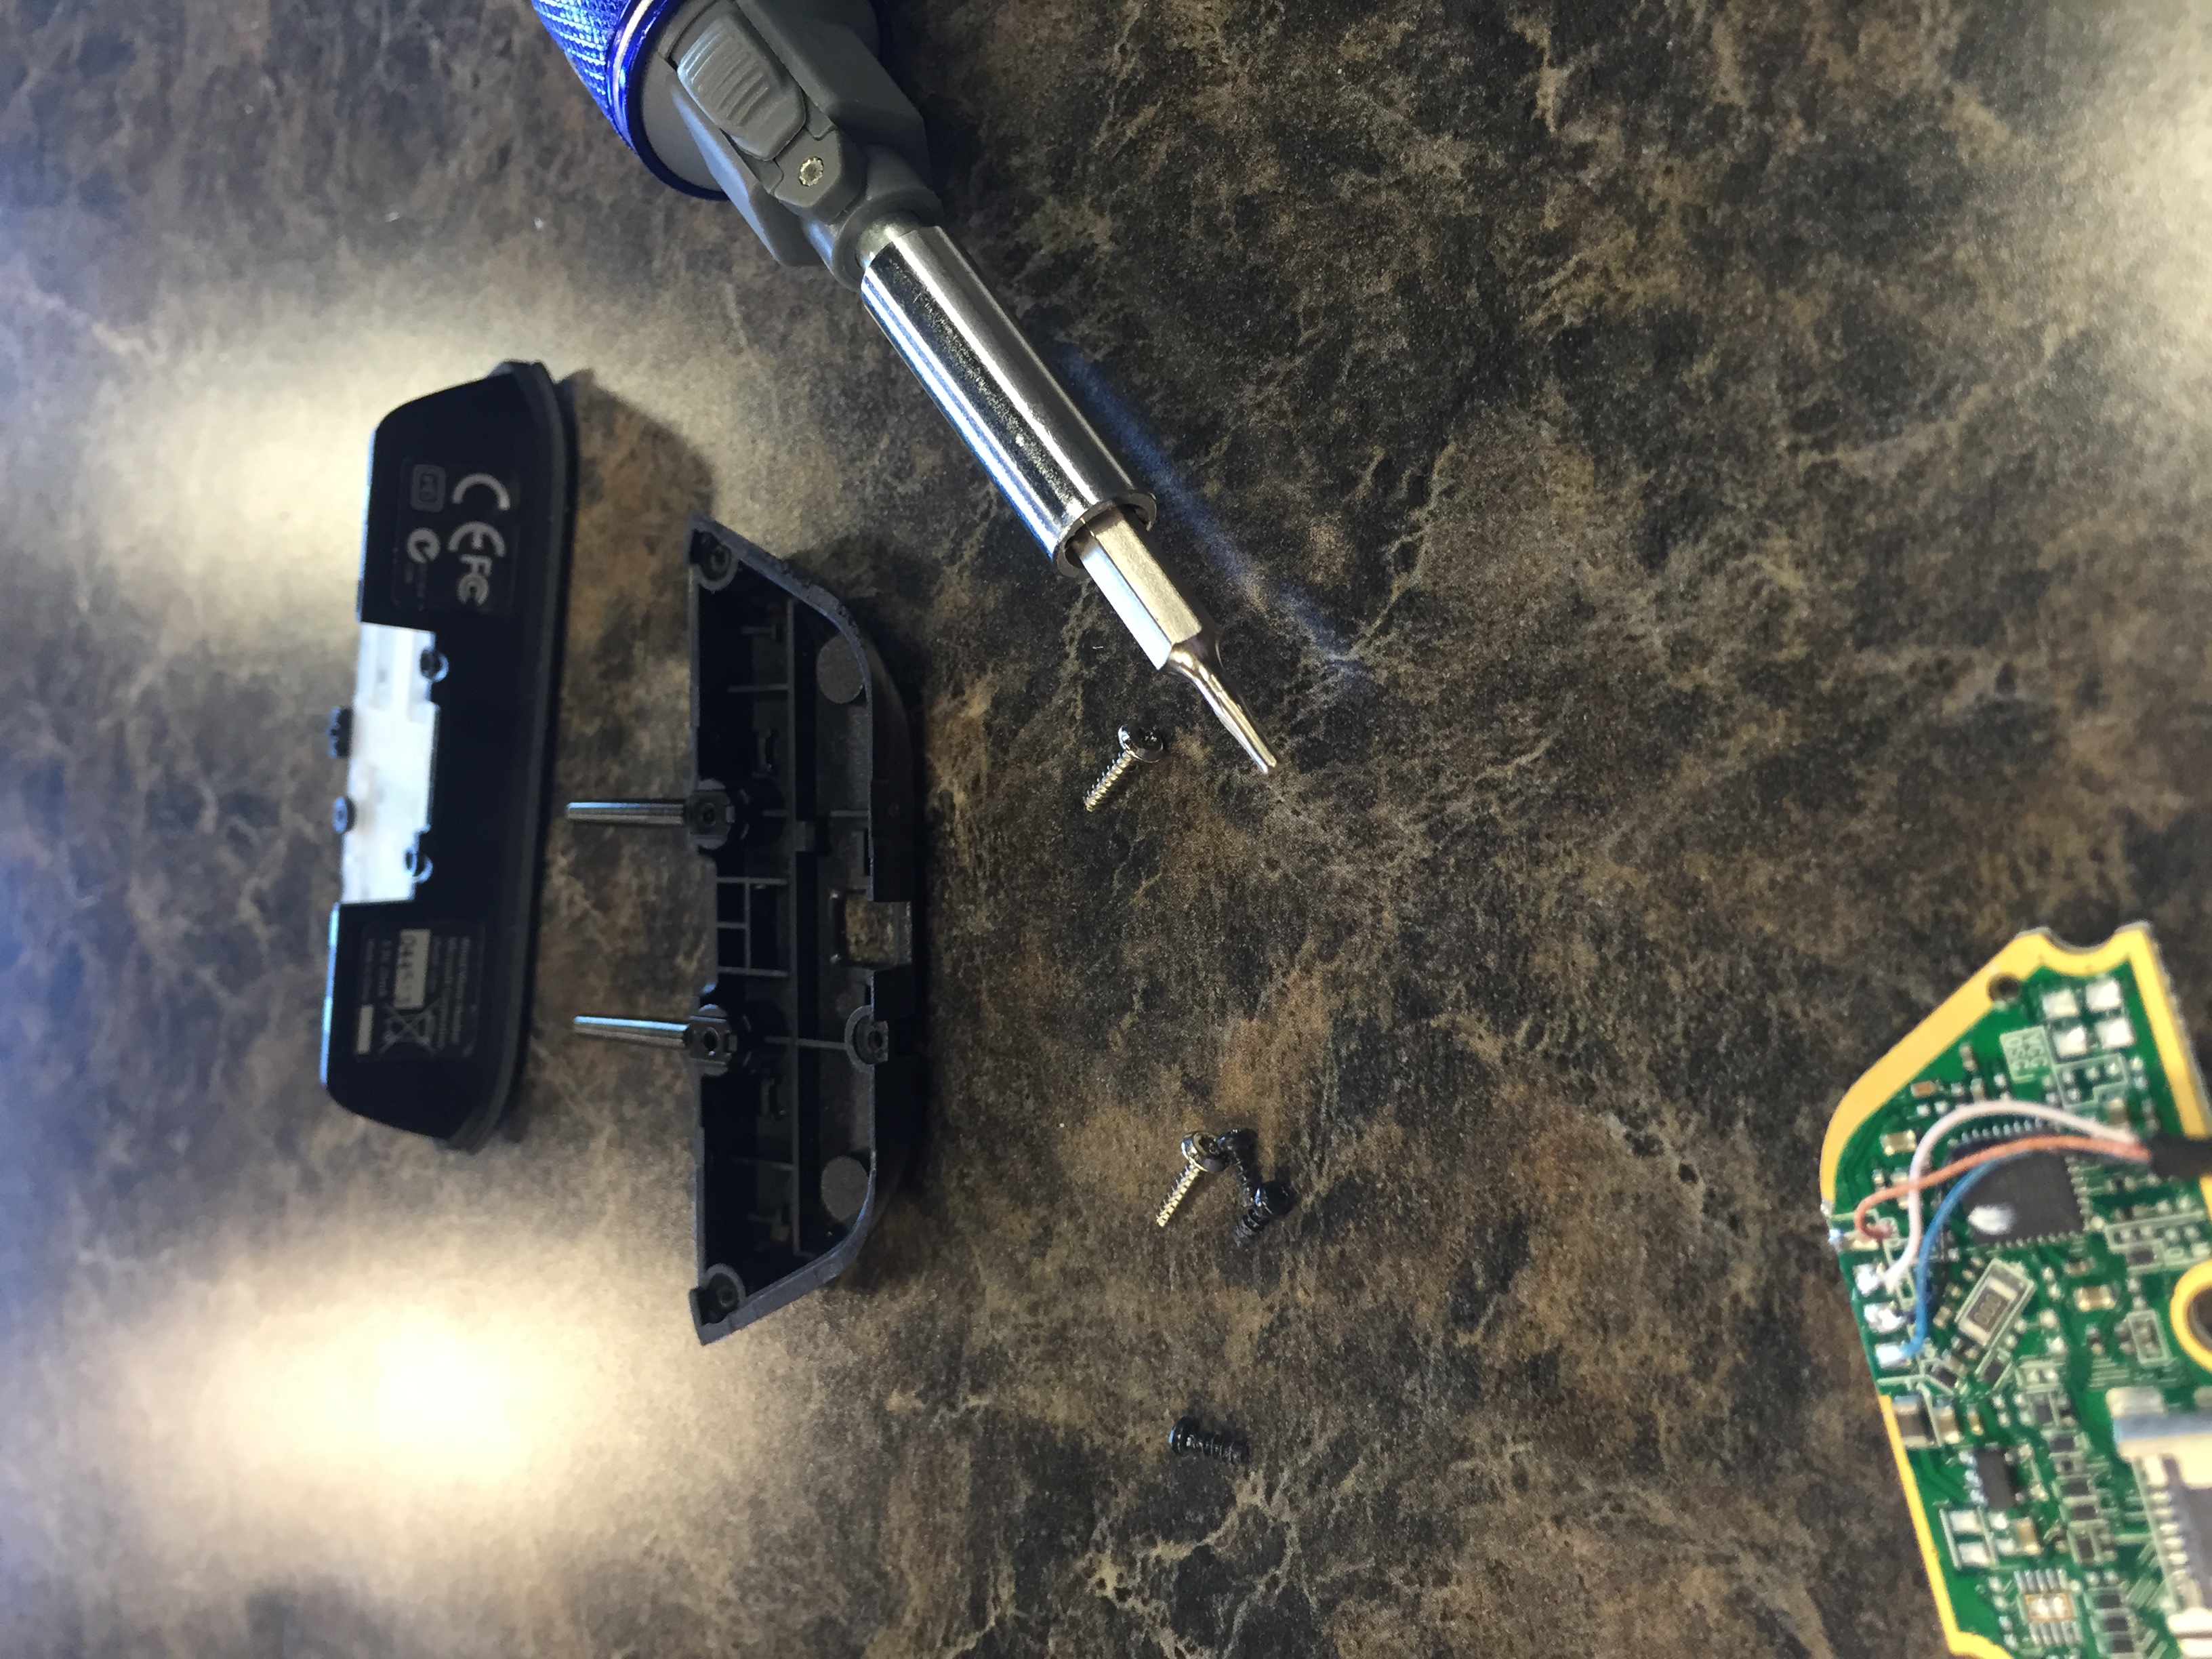
Immediately upon opening the unit you will notice the 4 wires soldered into the board for the speaker and microphone connections.
Be careful not to rip these off. Secure the unit down to your work area so you can redo the solder connections. The wires are very tiny, you’ll need to make sure they have a full connection to the board. The slighest cracked wire or short will need to be repaired. Carefully double check your work, a multi meter is always a good test to make sure nothing is grounded.
Don’t overdo the solder, you don’t need much, you need to just make sure you have encapsulated the wire onto the board correctly.
From left to right the wires go: BLUE, BLACK, WHITE, COPPER
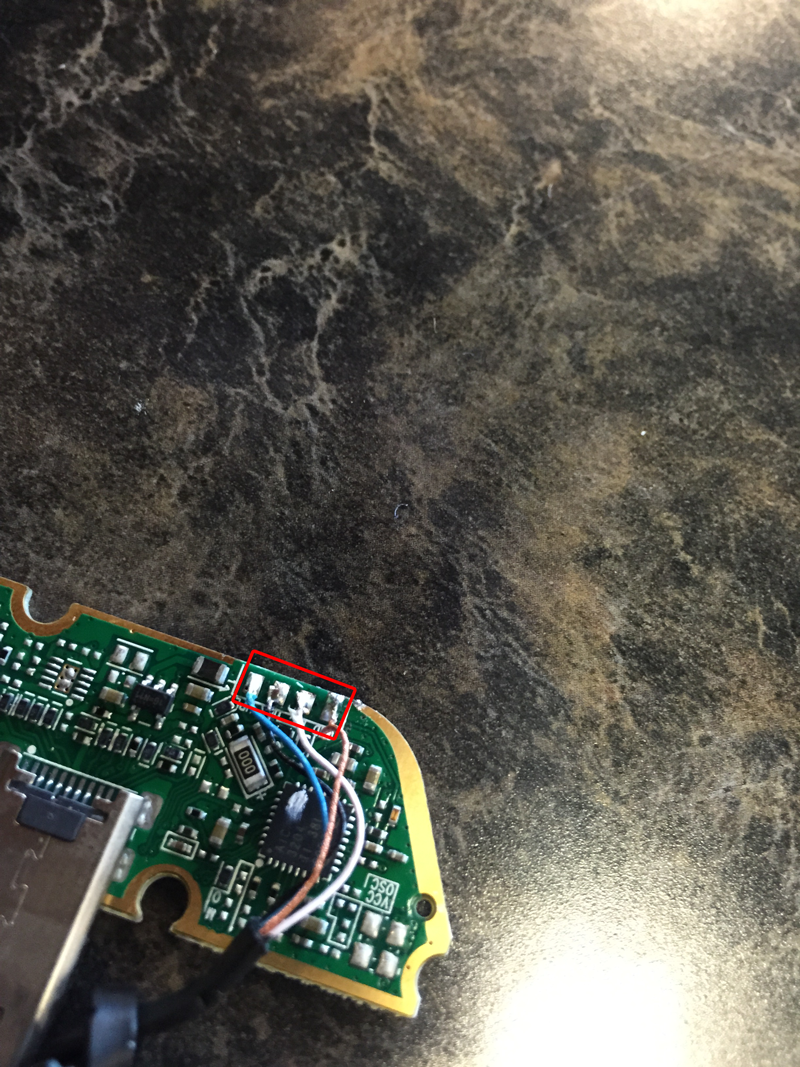
These wired connections to the board are what you will need to redo with solder.
Set your iron to ~275C and slowly redo the connections. Don’t hold the iron on the connections too long or you will burn the board and/or the wire.
Carefully reflow the wires to their respective contacts on the board, or simply add solder to any broken connection that you find.
You can test your work by opening Party Chat and screaming CAN YOU HEAR ME BRO? to people.
If it doesn’t work the first time, keep trying, check your work and make sure there are no cracks in the wires.
Sometimes you may have to cut the wires and start over, thankfully microsoft gave you some extra length to work with.
Hopefully this short little guide, while not too detailed in step by step, will help you get back up and running.